Documentation/AnalysisTool/First version: Unterschied zwischen den Versionen
Aus Semantic CorA
| (Eine dazwischenliegende Version desselben Benutzers wird nicht angezeigt) | |||
| Zeile 30: | Zeile 30: | ||
* Entities could be added or removed on demand, you should only click on red button (Del). | * Entities could be added or removed on demand, you should only click on red button (Del). | ||
== Actual version == | == Actual version == | ||
| − | See also: | + | See also: [http://smw-cora.org/index.php/Documentation/AnalysisTool Analysis Tool - new version] |
[[Category:Documentation]] | [[Category:Documentation]] | ||
Aktuelle Version vom 26. November 2014, 17:41 Uhr
Generalities
Analysis Tool is a widget designed to be used with the purpose to ease user's interaction with Semantic Inline Queries. Tool is mainly focused on top-down kind of wiki ontology, but not only. Simple queries, compound queries and nested queries are possible also.
Notice: Consider, please, that the interface is under development. Any suggestion, notice and critic would be mostly appreciated!--Lia Veja (talk) 16:05, 15 April 2013 (CEST)
How to use the interface?
Interface allows users to stepwise create semantic queries (#ask:).
- Step1: Create a wiki page and insert the following template call:
New: {{#tag:AnalysisTool | This is only text | name = Basil}}
Old: {{Analysis | Name = ''Some name''}}
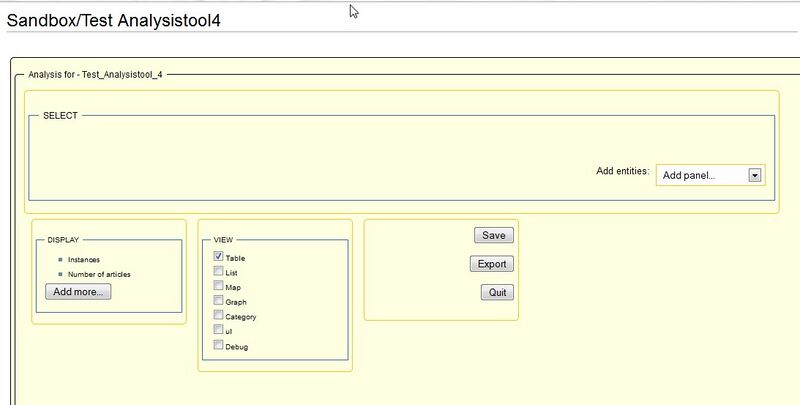
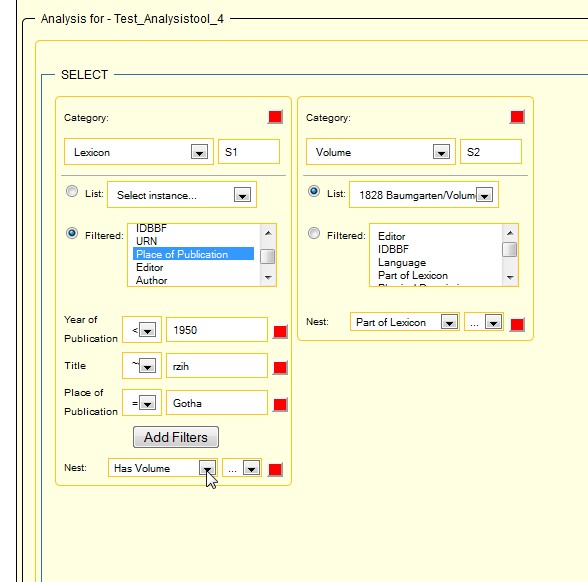
- Step2: Save the page as usual and an initial form will be shown on the screen.
Notice: If the screen is not looking that in the following diagram, please click on refresh from browser and MediaWiki button also, until the page is refreshed.
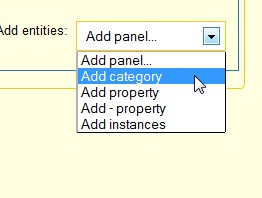
- Step3: Choose Add category or Add property, as you wish.
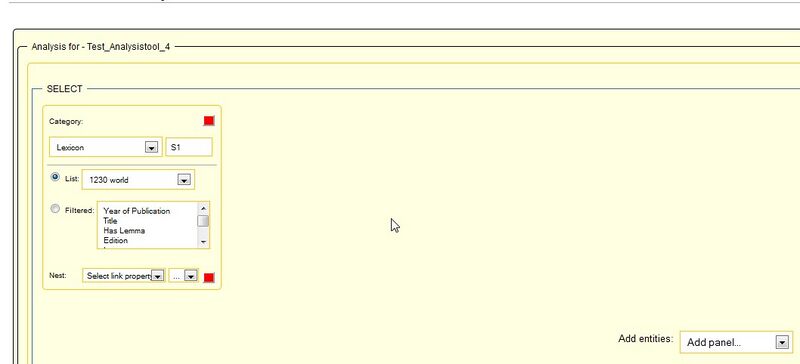
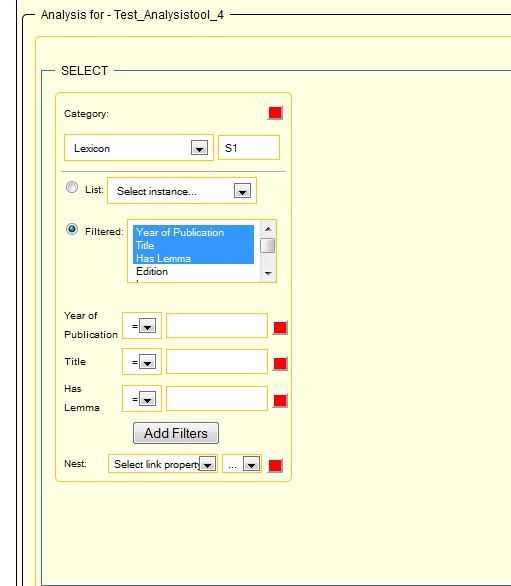
- Step4: You can choose instances ( choosing List) or you can filter something choosing Filter radio button.
- Step5: You can interrelate entities by choosing many panels.
- Step6: A nested query is also possible, by adding many connected entities (action add category button many times), and after that selecting a property for linking entities by name.
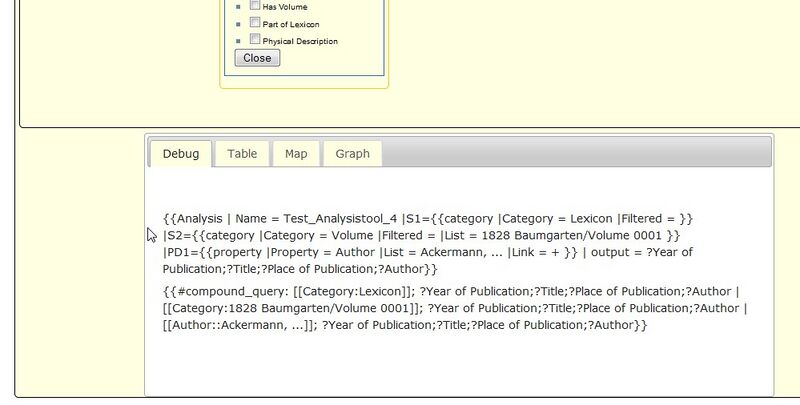
- Step7: At each of which step, a query will be shown on the bottom of the screen.
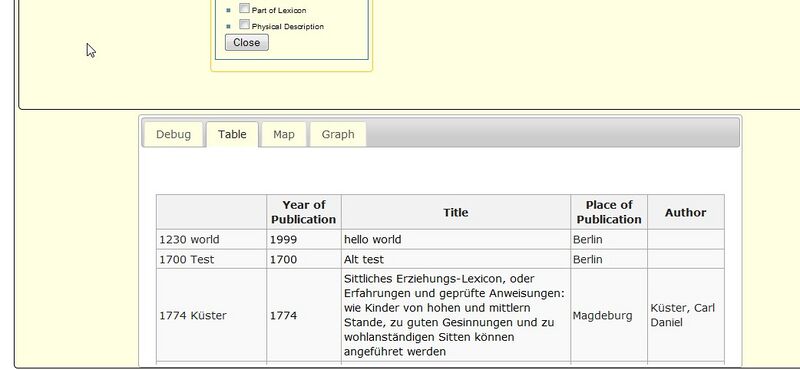
- Step8: Query will be evaluated and executed in background. The query result will be shown on the tab Table.
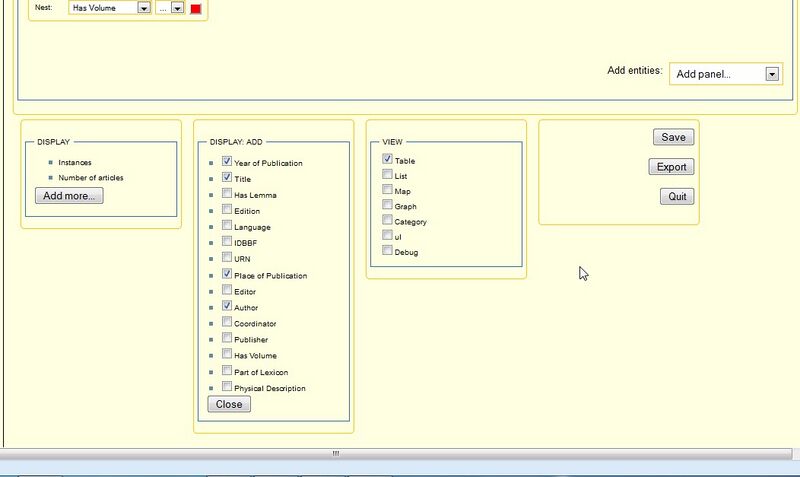
- Step9: User can choose additional properties to be shown by checking properties as appropriate.
- Entities could be added or removed on demand, you should only click on red button (Del).
Actual version
See also: Analysis Tool - new version

